Today I'm playing along with the MFT sketch challenge.
Here's my card:
I used one of my favourite images from the Sending a Smile stamps set and went with a bluebird of happiness theme. I die cut the window from blue and white cardstock, then used the white waste to stamp and colour the bird.
The sentiment was stamped under the window and the whole thing matted onto a white card base. Simple, clean and just the way I like it!
Supplies:
STamps: MFT, Sending a Smile
Inks: Versafine, onyx black
Die: MFT, Peek=a=Boo Window
Pens: Copic, R29, R39, B01, B02, B04
Thanks for your time today, it was fabulus to have you visit my blog.
Enjoy the long Easter weekend and keep crafting!
▼
Saturday, 31 March 2018
Friday, 30 March 2018
Uniko Challenge #46 - Colours
It's time to remind you all about the challenge going on at Uniko at the moment. There's a pretty palette of Springlike colours that we'd like you to use - some or all the decision is yours!
I chose the pink, orange and yellow and the amazingly fabulous new chrysanthemum - can't tell you how much I struggle to type and spell that word - stencil to create my card:
Unlike the spelling the actual stencil is an absolute breeze to work with and my card came together in no time at all.
I finished it off by die cutting a word window, stamping the greeting and then popping the window back into its aperture.
Supplies:
Stamps: Uniko, Simply Said Blocks
Inks:Ranger distress oxide, picked raspberry, spiced marmalade, fossilized amber; Memento, tuxedo black
Stencil: Uniko, Pure Florals, Chrysanthemum
Die: MFT Die-namics, stitched rectangle word window
There is a whole load of other amazing inspiration over on the Uniko blog - HERE. And some fabulous prizes up for grabs. So what are you waiting for? Go get crafting, after all the only way to win is to take part!
I'm popping this card into the challenge at Calling All Sistahs - thanks to DT Sandie for the heads up about this challenge.
Thank so much for your time today, I really appreciate that you spent some of it looking at my blog.
And keep crafting!
Thursday, 29 March 2018
Thursday Thoughts
Today I'm sharing a card I made - and really enjoyed creating - for the challenge at Inkspirational.
What a fabulous word prompt! It had me immediately reaching for my much neglected, but enormously loved box of Lavinia stamps.
I can't begin to tell you how exciting it was to go way back to when I first started stamping, before I even had a blog, and put this card together. There was a time when all I wanted to do was to re-create the awesome designs that I saw Tracey demonstrate at craft shows and although my style has now evolved and is generally much more CAS I still adore her work and could watch her demonstrate for ever!
The moon was masked with a circle and the inks added using torn paper strips - all learnt from watching Tracey. The dragon and mushrooms were added using my misti tool to get a clear and dark image and then I stamped the tree branch frame and the magical star cascade. The stars wer glittered silly using a gel pen.
Supplies:
Stamps: Lavinia Stamps, Spring Trees, large Dragon & Slender Mushrooms; Stars from my stash & may also be vintage Lavinia
Inks: Ranger distress, dusty concord, chipped sapphire, bluepring sketch, wilted violet; Versafine, onyx black
Pen: Sakura gellyroll, clear star
Thanks you so much for visiting my blog today, it's been enormous fun having your compay.
And keep crafting!
Wednesday, 28 March 2018
Wednesday Words
I'm playing along with MFT's colour challenge today.
I decided to try to make a little scene using the best match I could for the colours from the palette and keeping mainly to just one third of the card front:
I started by creating the backgound sky and beach using a torn strip of paper and my ink dusters. Next I stamped the greeting and coins directly on top.
The pirate and treasure chest were stamped onto scrap pieces of card, coloured and then handcut. the chest was adhered directly onto the base and the pirate raised up onto pads. I finished off by stamping a trio of flying birds.
Supplies:
Stamps: MFT, Party Like a Pirate
Inks: Mmemnto tuxedo black & summer sky; SU, smoky slate & peekaboo peach
Pens: Copic, E000, R22, R24, C3, C5, B00
Huge thanks for dropping by today, I always love to have your company.
And keep crafting!
Tuesday, 27 March 2018
Tuesday Talk
Today I'm sharing a card I created for Just Us Girls using their Spring themed mood board.
So pretty! And I totally fell in love with DT Carol's card and have unashamedly used it as the inspiration for my CASed version:
I stamped the background stripes using pale blue to pick up on the colours and the chair from the photo and also Carol's card. The sentiment went straight on top.
The bright pink flowers really caught my eye too and I stamped, coloured and handcut a trio to add on top of the stripes. Love these colours together, so fresh and vibrant!
Supplies:
Stamps: Uniko, Pure Florals:Cosmos, Birthday Sentiments, Background Blocks
Inks: Memento, tuxedo black & summer sky
Pens: Copic, RV02, RV04, RV09
Thanks so much for your time today, it's been super to have you visit my blog.
And keep crafting!
Monday, 26 March 2018
Monday Moment
I'm here today to hare a card I made for the current challenge at Less is More.
So one layer plus stencils had me thinking for a while, not so much the one layer bit but the stencils. I love using stencils as part of the background but find it quite a challenge to use them as the focal point of a card, something about the smudgy edge finish I think. Anyhow here's my card:
But I'm quite liking the edges on these buterflies, seems to suit the airy fluttering feel of the images. They were inked with three colours of distress ink and then a ittle water spalashed and blotted on them to create some markings. The antennae were drawn with pen.
I added a stamped sentiment which seemed particularly appropriate to my misgivings about using a stencil.
Supplies:
Stamps: Uniko, sentiment from Spring Botanicals Daffodil
Stencil: ARTplorations, Flutters & Splatters
Inks: Ranger distress, blueprint sketch, mermaid lagoon, cracked pistachio
So pleased to have your company today, thanks so my for looking.
And keep crafting!
Sunday, 25 March 2018
Sunday Slot
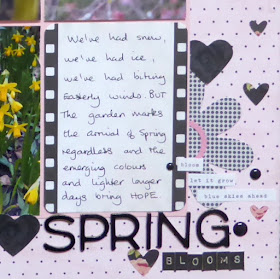
Has Spring arrived yet at your part of the world? Well I'm not too sure it has here weather wise but my garden seems determined to bloom anyway and I've created a scrapbook page to document this. I used the second March sketch from Let's Get Sketchy as my starting point.
Here's my page:
I started by choosing the background papers to tie in with the blossom photo. The three photos and the journalling card were matted onto pale pink cardstock before adhering to the background papers.
A quick trawl through my stash and I discovered the pink doily which was a gift from scrappy friend Lizzy Hill and some ancient Stampin Up flower stickers that have been lurking in my sticker box for ever. And I also remembered I had all these wonderful garden themed word strips that I thought I'd never be able to use - so now I have!
A simple bit of journalling, some punched and die cut hearts and those 'required' trios of enamel dots - definitely a trend for me at the moment - plus a title and I was done. Loving the black and pink together!
Supplies:
Papers: Photoplay, Vintage Girl
Alphas: AC thickers, Hardcover; Simple Stories, So Rad
Die: Lawn Fawn, hearts
Punch: Martha Stewart, heart
Stickers: Simple Stories, Bloom & Grow; SU - in my stash for ages & can't rememebr the collection
Embellishments: pink doily - gift from a friend; enamel dots from my stash
Huge thanks for dropping by my blog today, I really appreciate you taking the time.
And keep crafting!
Saturday, 24 March 2018
Uniko Revisit Blog Hop - Fun Flowers Clear Stamp Set & Stencil
March is re-visit month at Uniko and I'm here today to share a few samples to show you the versatility of the stamps and stencil Fun Flowers.
Now would you believe the colours for all my creations were inspired by my winter jacket? Bet you have a pretty good idea which colour will be included then! No not purple but a close run second favourite a lovely dusky pink combined with a sultry grey.
I prepared a trio of atc cards by using the Fun Flowers stencil - one all pink, one all grey and one a combo of the two colours. I then trimmed them down and matted them onto matching card stock.
Out came the Fun Flowers stamps and I hand cut or punched them, popped them on pads and added them to the cards. Last of all I added a word sentiment using Uniko's Simply Said Blocks.
And these tiny pieces of creativity pretty much set the scene for my next two cards. I stamped the large flower and then added two more stamps from the set. Then I coloured and hand cut round the large flowe, popped it on pads and placed it over a die cut window.
I decided to stick with the same sentiment set and added a happy birthday and matted the whole thing onto matching pink card stock.
My final share for today uses the punched smaller flowers from the set placed over the stencilled background flowers.
This time I used a grey base card and added a sentiment and line of hearts from Simply Said Blocks.
I finished off by adding small enamel hearts to echo the stamped hearts.
Supplies:
Stamps: Uniko Fun Flowers, Simply Said Blocks
Inks: SU, sweet sugarplum, smoky slate
Dies: MFT Die-namics, rectangle peek-a-boo window
Punch: Woodware, circles
Card: SU sweet sugarplum
Pens: Copic, C3, RV63
Enamel shapes: SU, sweet sugarplum
I hope you have found my post inspiring and love my colour choices. I certainly enjoyed making these cards and my atcs are up for grabs if anyone would like one of them - just leave me a comment with your email address and I'll get back to you.
Now you need to go hopping round to discover what the rest of the Uniko DT have been up to with this wonderful stamp set and stencil. Just follow the blog hop list and leave comments on your way and maybe you'll be a lucky winner.
Huge thanks for visiting today. Good luck with the blog hop!
And keep crafting!
Friday, 23 March 2018
Friday Focus
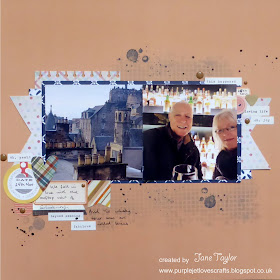
I've got my scrapbooking hat on again today and have made a page about our trip to Edinburgh last November using the second March sketch from Stuck?!Sketches.
This was such a fun sketch to follow and my page came together in no time at all.
I choise colours that I thought were reflected in the chimney and whisky bottle photos and added in a touch of dark blue for dramatic effect. I used a stencil to create the background mesh and some stamps for the splodges. The main elements of the layout were then added on top.
Then i got busy adding all the little embellishment bits and pieces and the journalling.
I finished off with a splattering of brown collour mist and the addition of two trios of enamel dots.
Supplies:
Stamps: SU, Gorgeous Grunge
Inks: SU, night of navy
Stencil: Memory Box, Texture Mesh
Punch, ek, note pad edger
Stickers: MAMBI sticks; Basic Grey, Carte Postale & Type Set; Simple Stories, Snow Patrol; October Afternoon, Bookworm
Embellishments: Mister Huey's Color Mist, dark calico; Sparklets, enamel dots
Thanks so much for your time today, I really love that you spent some of it looking at my blog.
And keep crafting!
Thursday, 22 March 2018
Thursday Thoughts
I'm sharing a card today that I created for a brand new card challenge hosted by Scrap the Boys. I've been there before to try my hand at their scrapbook challenges, but a card challenge is a new venture for them.
I've followed the sketch almost literally for my card and kept in mind that it needs to be suitable for a boy.
I chose this strong and striking zebra image and stamped it onto some patterned paper which I then die cut into a stitched circle. I added three narrow strips of paper and die a cut a star from the same paper pack.
The sentiment was stamped using my misti tool as I knew it would need several stampings as I'd positioned it straddling the die cut circle.
Supplies:
Stamps: HLS, Born To Be Wild
Inks: Memento, tuxedo black
Dies: Xcut, star; MFT Die-namics, double stitched circles
Paper: Lawn Fawn, Beachside
Thanks a lot for dropping by my blog today, I really appreciate it.
And keep crafting!
Wednesday, 21 March 2018
Wednesday Words
I'm playing along with Let's Get Sketchy today. As well as a sketch there's also a mood board to help inspire.
Here's my page:
I've use colours from the mood board and added a strip of flowery paper and rotated the sketch as my photo was portrait. I'm also thinking the gruffalo costume links quite well with the hair and expression of the top pic in the mood board.
I've added a couple of embellishment stacks and love adding all these little word labels - a bit of a current trend for me.
I'm also really pleased with how all the pinks inspired by the mood board work so well with this boy page because of the colours of the cushions and throw on the sofa.
Supplies:
Papers: Simple Stories, Sunshine & Happiness; Echo Park, Celebrate Easter
Alphas: AC thickers, Memo
Dies: Scut spiro circle
Punch: Woodware, circle
Embellishments: Simple Stories brad and stickers; Sparklets enamel dots
Huge thanks for dropping by my blog today, your visit has made my heart happy.
And keep crafting!